Hello!
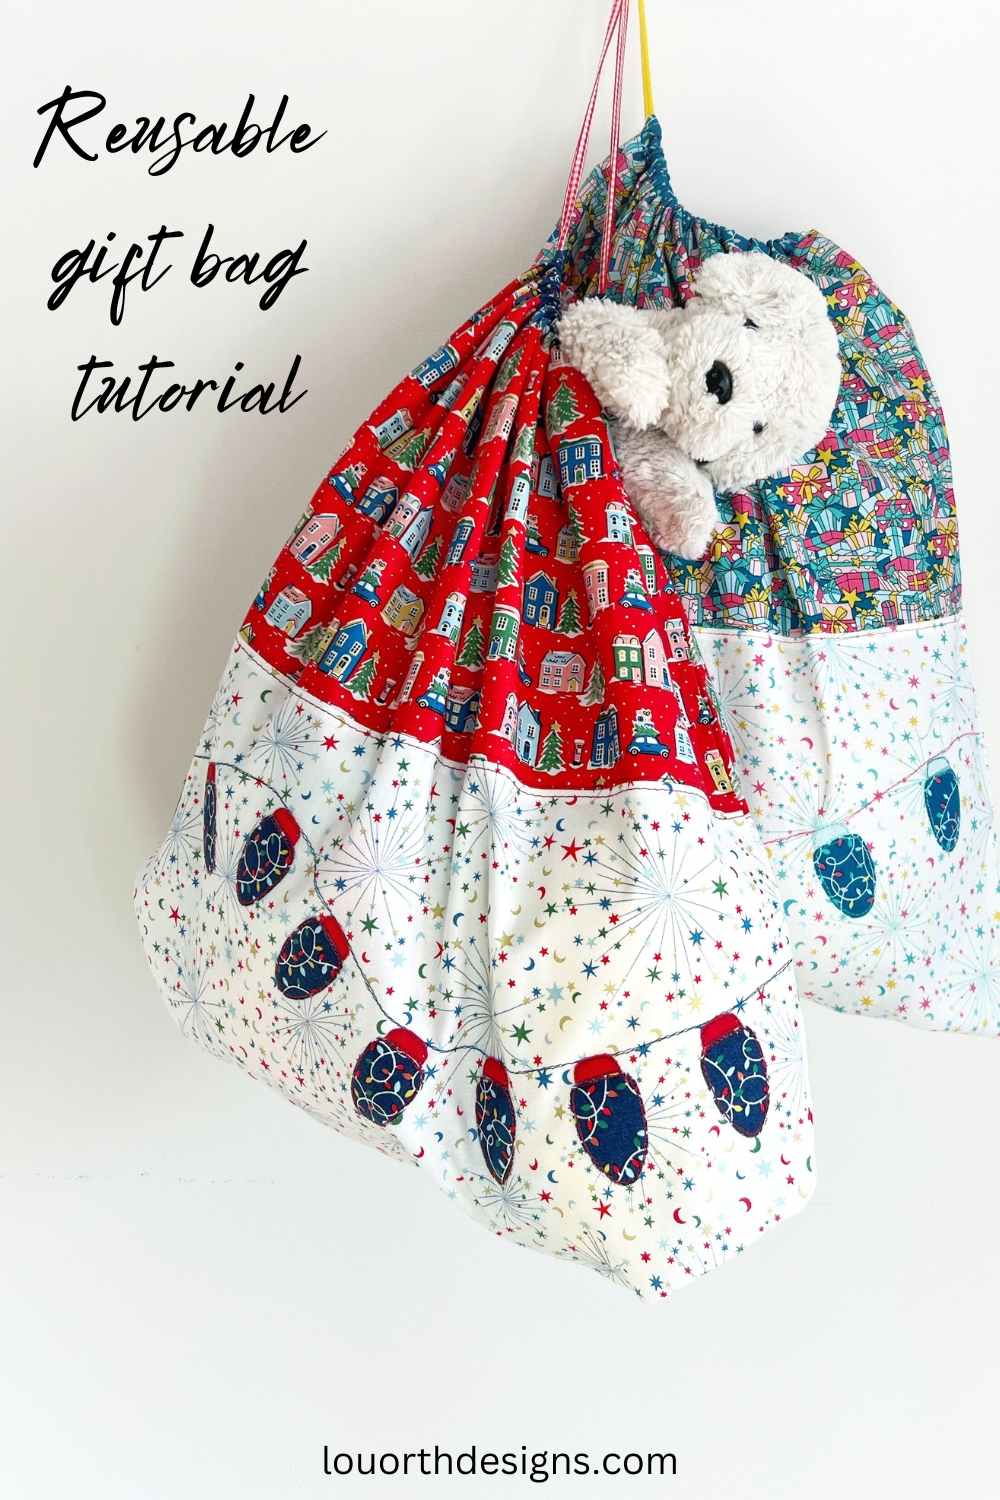
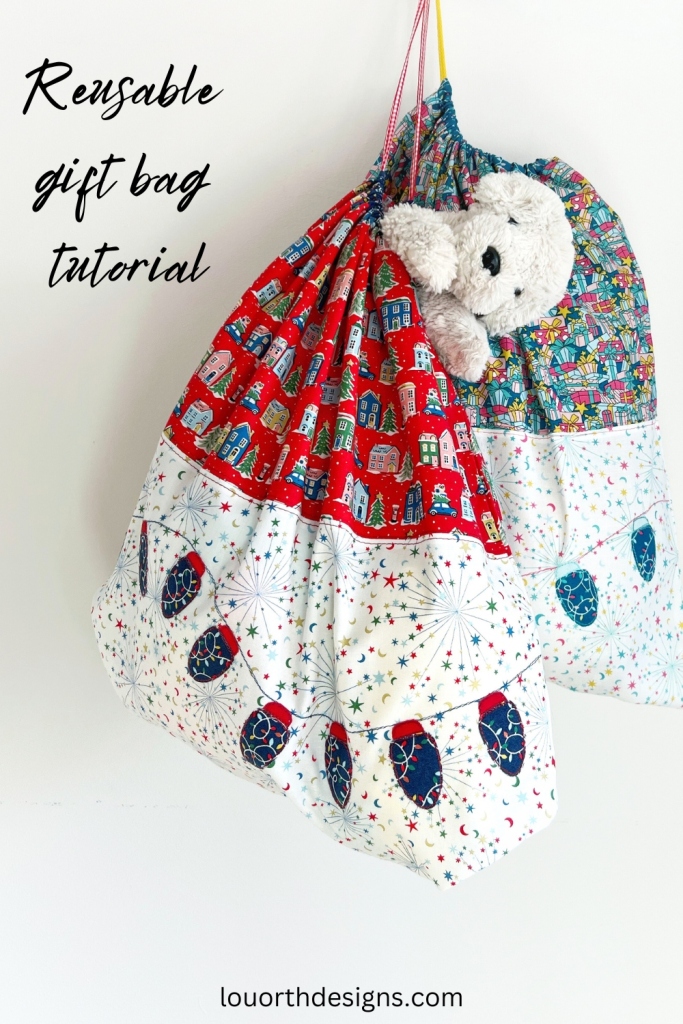
I am here today with a fun a quick, re-usable (and super cute) gift bag. Gift bags are great for wrapping up those hard to wrap presents or for bundling up many smaller ones. You can use them again and again or the lucky recipient gets an extra gift bag!
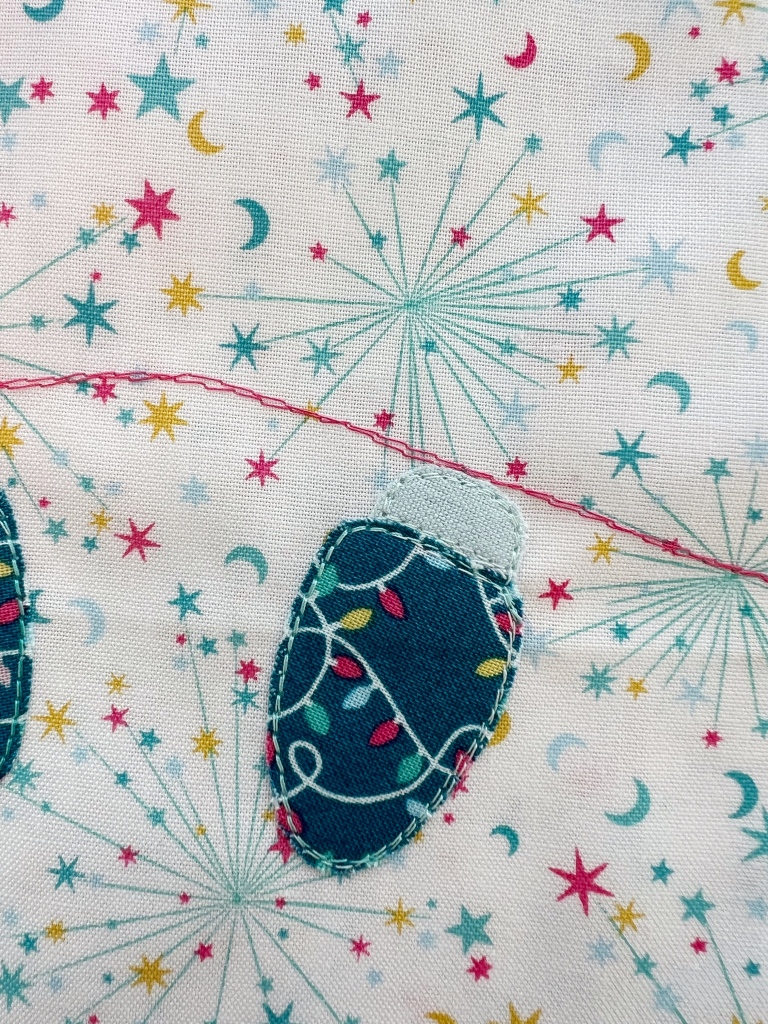
This gift bag is very roomy and quick to put together. I have added some applique fairy lights to mine using the Winter Glow applique pattern but you can keep it to plain fabric if you like.
Bonus is that it can be made with fat quarters!
Supplies
3 FQs
(This is also enough if you are adding the Winter Glow applique.)
Choose 2 of you Fat Quarters for you main bag and 1 Fat Quarter for your ribbon channel and applique shapes, if using.
I have used Liberty quilting cotton ‘Deck the Halls’ fabric for both bags pictured

1 metre (40″) of ribbon or cord
(max 1/4″ thick)
Thread
I use one thread as the ‘wire’ for the applique and another for attaching the applique shapes.
For these projects I have used:
2600 50wt for all construction sewing.
Traditional colours: 40wt, 1103 (red), 50wt, 2783 (blue)
Modern colours: 50wt, 4654 (teal), 50wt, 2530 (pink)

Cutting
Cutting is listed as width x height
Main bag.
For each of your 2 FQs cut:
20″ x 9″ (x 2)
Channel:
20″ x 1 1/5″ (x 2)
Assembly
If you are adding any applique or details do this before construction. I have added the Winter Glow applique pattern to the bottom half of the bag.
1. Mix your two 20″ x 9″ pieces and attach along the long side. Repeat so that you have two panels, front and back.
2. Press the seams open and top stitch either side of the seam line.

3. Make the ribbon channel by folding in the ends of the 20″ x 1 1/2″ piece twice by 1/4″ so that the raw edges are encased.
Press and stitch in place. Next fold the whole length wrong sides and press. Baste stitch approx 1/8″ away from the raw edge.
Repeat for both channel pieces.
4. Line up and centre the channel piece along the top of one of your main pieces. Clip in place and attach using a 1/4″ seam allowance. Press so that the seam allowance faces towards the main bag and top stitch in place. Repeat for the remaining main piece and channel piece.
5. Lay the two main pieces right sides together. Aim to line up the middle seams and the top edges. Clip all around and sew down one side, along the bottom and up the next side. Leave the top free and back stitch at beginning and end.
For added neatness you can zig zag or coverstitch over all the raw edges.
6. Turn the right way around and using a safety pin, loop the ribbon or cord through both the channels. Once the ribbon is all the way through, tie the ends together so that they don’t come loose.
7. Admire your finished bag and get ready to stuff with gifts.
Happy sewing!
Lou


Leave a comment